|
||
|
|
How To ĹStop GoingĺArizona Boating-Safety Expert Shares Anchoring Tips
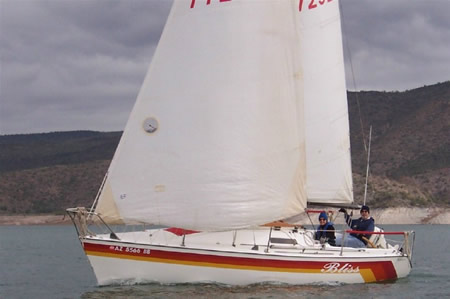
BLISSFUL START -- to New Year 2005! The Lake Pleasant Sailing Club traditionally has a raft-up on New Year's Eve. Sailors on about nine boats spend the night on Lake Pleasant. This particular time had great wind and smooth water. Ed and Debbie Huntsman are shown enjoying the annual event in their sailing vessel Bliss.. By Ed Huntsman There are several items that prudent and thoughtful boaters carry on board their boats and watercraft. They include extra parts, props, fire extinguishers, life jackets, and bulbs — numerous pieces of miscellaneous parts and equipment that aren’t necessarily required by law or regulation but could have a dramatic impact in the event of an emergency. Among the non-required pieces of equipment is an anchor. Sailboats, powerboats, rowboats, kayaks, and personal watercraft (PWC) — they’re all quite similar when it comes to anchoring. Not usually thought of as an emergency piece of equipment, there are really only a couple of reasons that a boater would want, or need, to deploy or “set” an anchor. The first is in the event the operator loses the ability to control his or her watercraft. By correctly and effectively deploying an anchor, the operator can maintain the watercraft in as safe a position as is possible without doing further harm, impeding the safe voyage of others on the water or risking the safety of those aboard. Other reasons for setting an anchor would be to stop to fish, have lunch, go for a quick swim, or spend the night. Many of us have problems occasionally when we try to deploy an anchor, and it is often because we don’t understand some of the finer points of this seemingly simple task. There really is more to anchoring than throwing the anchor over the side of the boat. Be Sure To Have Correct Ground Tackle If you’ve had trouble setting the anchor, try some of these tips and guidelines to take the mystery out of effective anchoring. Make sure you have the correct ground tackle — an all-inclusive term that encompasses the anchor, shackles, chain and line. Use the correct type and weight of anchor for the type of bottom where you’ll be anchoring. My wife and I carry two fluke-style anchors on our 23-foot sailboat: a Bruce and a Danforth, and both are a couple sizes larger than what is recommended for our particular boat length. However, I’ve never heard from anyone that the anchor dragged because it was too big! Both of these anchors are effective for the submerged desert bottom where we sail. Consider where and how you will stow the anchor when making a purchase. Know what you want before you buy it; do some homework. This is the time to ask lots of questions if you’ve any doubts. Ask around your marina of those that you know who “anchor out” and evaluate their responses. Don’t always depend on the well-intended recommendation of salespeople — who may not even be boaters — unless you know them, or you can see the water they boat on from the front door of the store. Why Chain? Chain is needed because it more easily stands up to the abrasion, wear and tear of sand, rocks and mud on the bottom than does line. Chain also helps keep the shank of the anchor parallel to the bottom to increase holding power as well as to absorb much of the shock on the rode caused by wind and current. And, be sure to “mouse” the shackle that connects the anchor to the chain. This can be accomplished by inserting a small stainless steel or galvanized wire through the hole in the pin once it has been screwed through the shackle. Finish it off by twisting the two ends together, just like on the loaf of bread in your galley, and bending the twisted pair back towards and along side of the shackle, out of the way. This will keep the pin that secures the rode to the anchor from coming out, and finishing it off will keep you hands and fingers from being cut when it is handled. Line: What Kind, How Much? The next component is line. I recommend three-strand nylon line of the best quality you can afford. For boats up to 17 feet, use 5/16” diameter line; 18 to 24, use 3/8”; 24 to 30 use 7/16”, and 30 to 36 use ½” line. Splice the line around a galvanized thimble so the line won’t suffer abrasion by the shackle that attaches it to the chain. If your splicing skills need help, pre-spliced anchor rode and anchors are usually available at many boat parts and supply stores or chandleries. Again, I recommend that inland boaters use nylon line in addition to the appropriate length of chain because it is stronger, provides more stretch, abrasion and rot resistance and affordability. By the way, if you have a larger (42-foot-plus in length) boat with a windlass and stay primarily on the ocean or a large body of water, chances are you already have an all-chain rode. How much line to buy for the rode? Here again, opinions vary, and I recommend at least 12 to 15 times the depth (or more) of where you may be anchoring. If the depth of the water is 20 feet where you plan to do most of your anchoring that would translate to approximately 300 feet of line— in addition to the chain rode. You’ll want the extra line because should your anchor start to drag, you should pay out additional line. And since you should always start with a scope (the amount of line between the anchor and where the rode is connected on your boat) of about seven to one (7:1) for an overnight hook with a depth of 20 feet, assuming you’ll tie off the rode to a deck cleat 4 to 6 feet off the water, you’re now looking at 26 feet. So you’ll need to start with about 180 feet of rode (20+6=26, times 7 equals 182). Should the wind increase during the evening causing your anchor to drag and extra rode is needed, you have plenty! Caution On Our Inland Lakes A note of caution for those anchoring on inland lakes in front of or behind dams’ powering turbines: Don’t forget that there are often significant lake-level fluctuations due to water’s being released out of, or into the lake. This occurs often on the Salt River system, and many have found themselves in challenging situations as a result of the flow. I must also note here that if you are an inland boater, you’ll probably never use more then a couple hundred feet of rode. But, should you be caught in one of Arizona’s infamous monsoon storms and decide you need to anchor to ride out the storm, you’ll be happy that you bought the extra length to make your anchor that much more effective. About Cleats Now you have your anchor, shackles, and rode; make sure you have a strong and easily accessible deck cleat that is backed to attach the rode to once you’ve deployed the anchor. Any cleat that could be placed under heavy stress should have a large plate backing it between the actual cleat and the deck underneath so as to spread out the surface area, absorbing the stress when the line pulls against the cleat. Trying to ride out a storm, or just enjoying an evening under the stars and having a deck cleat pull out because it was only secured to the boat by a couple of screws into gel-coat could cause more than just an inconvenience. Again—this is no time to go on the cheap. Consider a good quality, easily accessible open-style cleat large enough to accommodate the size of line being used for rode, attached with quality stainless steel or galvanized Nylock nuts, bolts, washers and lock washers and backed with a plate appropriate for your boat, where it will be placed, and the size of the cleat. After all of this, anchoring is easy! Load up your ground tackle, have a great day on the water and select an area to anchor that has a bottom that matches your type of anchor, offers plenty of room, shelter from the wind, current and other boat traffic as well as some seclusion so your lunch or evening won’t be interrupted or disturbed. Now, Some Calculations And Your PFD Once you’ve selected your anchorage, calculate how much rode you will need. Remember, the general rule is four (for lunch) to seven (for overnight) times as much rode as the depth of the water plus the length of rode from where it comes out of the water to where it will attach to your deck cleat on the bow of your boat. If the water depth is 15 feet, and there are 5 feet from where the rode comes out of the water to where it attaches on your boat (a total of 20 feet), you would multiply 20 feet by four to seven to determine the amount of rode to put out. A couple of added tips here to always think about — First, if you’re not already wearing one, put on a life jacket before working with an anchor on the bow of a boat; this is an event that lends itself to accidents and falls overboard. Communication is important in most aspects of recreational boating, and anchoring is certainly no exception. But, next to launching or retrieving a boat at the ramp, the next activity most often responsible for angry friends and spouses is anchoring. Don’t yell too loudly to the person operating the boat while you’re trying to deploy the anchor; many relationships have suffered from well intentioned, but overly loud comments or poor instructions shared with a tense, elevated voice level. Next to wearing a life jacket, the most important thing to check before starting is that the end of the rode is attached to the boat so you don’t lose control of it. If your boat is large enough to have someone at the helm, ensure you are not moving (if possible) as you deploy the anchor and rode over board, hand over hand. Make sure you don’t allow the rode to slip through your hands as a fishhook or other foreign material imbedded in the rode could cause an injury. Once you feel the tension release from the rode, you’ll know that the anchor is now on the bottom, and you can instruct the operator to back up at idle speed as necessary, paying out the appropriate amount of rode hand over hand. At the appropriate distance — depending on how quickly your boat slows down in reverse — advise your operator to return the boat to neutral so that the boat isn’t moving too quickly as you pay out the rode. Once you’ve reached the length of rode that needs to be deployed and the boat is stopped, fasten the rode to the deck cleat utilizing a cleat hitch. Know Your Knots (You can learn this knot in most any boating education class). As the saying goes, if you don’t know how to tie a knot, tie a lot of them — but not so many that you’ll have to use a knife to cut the rode to leave! Now that your anchor is deployed and the rode is out, ask the operator to place the boat engine in reverse idle and back down at idle speed on the rode to test your anchor set. You can carefully place the palm of your hand on the rode just past the cleat towards the anchor to feel for vibration. If the line is vibrating you’ll know that the anchor is dragging, and you should advise the operator to return to neutral. Continue to pay out additional rode increasing the length of scope. Once another 10 percent or so of rode is payed out, try the test again to ensure your anchor is set. Once you’re convinced you have a “good hook” and the anchor is set, using easily identifiable reference points or landmarks aligned with a point on your boat, take three or more bearings periodically to make sure you’re not drifting. A Stern ‘Don’t’ Its always good advice to not anchor from the stern — don’t! Many a boat has been swamped and sunk because of an anchor and rode tied off to the stern and left unattended. But I can tell you that sometimes it is easier and safer to startfrom the stern, especially if you are alone — a practice I discourage, but there are those times we may be by ourselves. However, just because you start from the stern doesn’t mean you finish or tie off the rode there. Again, if you don’t already have it on, don your life jacket, deploy your anchor, paying special attention to not damage your motor, prop or rudder, and pay out the rode as you walk forward to the cleat on the bow where the rode will be attached. The anchor can also be retrieved from the stern as well, but extra caution is again needed because of the risk of damage to your motor and rudder, and the potential for the rode and anchor to foul. When retrieving the anchor, follow the same procedure in reverse. Put on your life jacket, and take in the rode (hand over hand) allowing it to pay into the anchor bin or other container freely. Believe it or not, for some reason known only to Neptune, anchor rode always seems not to tangle when retrieved in this manner and always pays back out quite easily the next time! A Challenge Made To Look Easy If your boat is small enough, you won’t need any assistance from the operator to idle up as you retrieve your rode. But, if you do use power to approach the anchor, be careful and do so slowly and sparingly so as to not run over the anchor and risk fouling the rode in the boat’s propeller or rudder. Regardless of how deep the anchor has set, it usually pulls up fairly easily if the rode is straight up and down. Be careful not to allow an anchor fluke to come into contact with the side of the boat as the gel-coat can be easily damaged. Should the anchor be dirty and covered with mud, simply douse it up and down in and out of the water a few times to clean it before hauling it aboard and stowing it. If the anchor has fouled on a tree, underwater cable, or other debris (which does happen!), a trip line attached to the anchor before deploying it can often be used to free it and spare the embarrassment and expense of having to leave an anchor and rode behind. Leave the anchorage slowly — ensuring that your boat doesn’t run over anyone else’s rode and that your engine noise doesn’t disturb another boater. Anchoring can be a challenge, but by following these few tips and practicing, you can make it look easy.
|
|